
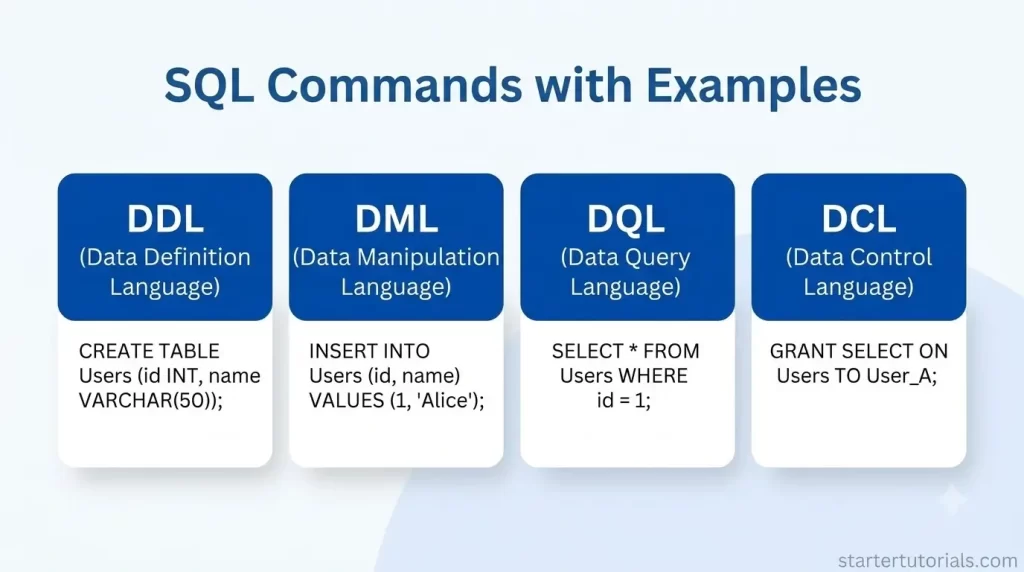
Mastering SQL commands with examples is the most effective way to understand how relational databases communicate, organize, and retrieve data. This comprehensive guide breaks down all core SQL statement categories, including DDL, DML, DQL, DCL, and TCL using a unified university database schema so you can easily learn, apply, and refine your database management skills.
The university database schema is:
Department (Dept_ID, Dept_Name, Chair_Prof_ID)

Department_Phone (Dept_ID, Phone_Number)

Professor (Prof_ID, Prof_Name, Dept_ID)

Dependent (Prof_ID, Dep_Name, Age)

Student (Student_ID, Student_Name, Dept_ID)

Course (Course_ID, Course_Name, Prof_ID)

Enrollment (Student_ID, Course_ID)

Project_Assignment (Student_ID, Course_ID, Prof_ID)
DDL commands with examples
Data Definition Language (DDL) commands in SQL are used to define, modify, and manage the structure of a database, such as creating tables, altering their attributes, or removing them entirely. Unlike commands that deal with data inside the tables, DDL commands work directly on the database schema.
Here is a breakdown of the primary DDL commands using the university database.
Create command
Used to build new database objects, such as tables, from scratch by specifying column names, data types, and constraints.
Example Query: Creating the Department table with its columns and primary key.
CREATE TABLE Department (

    Dept_ID INT PRIMARY KEY,

    Dept_Name VARCHAR(50),

    Chair_Prof_ID INT

);
Output:
Table created successfully.
Alter command
Used to modify the structure of an existing table, such as adding a new column, removing an existing column, or altering column definitions.
Example Query: Adding an Email column to the Professor table.
ALTER TABLE Professor

ADD Email VARCHAR(100);
Output:
Table altered successfully.
Drop command
Completely removes an existing table or object from the database along with all of its structure, data, indexes, and associated constraints.
Example Query: Removing the Project_Assignment table entirely from the university database.
DROP TABLE Project_Assignment;
Output:
Table dropped successfully.
(The Project_Assignment table no longer exists in the database.)
Truncate command
Deletes all records/rows from a table instantly while retaining the original structure (columns and constraints) intact for future data.
Example Query: Clearing all historical rows from the Enrollment table.
TRUNCATE TABLE Enrollment;
Output:
Table truncated successfully.
(All rows removed; empty structure remains.)
Rename command
Used to change the name of an existing database table or column to a new name.
Example Query: Renaming the Dependent table to Prof_Dependent.
RENAME TABLE Dependent TO Prof_Dependent;
Output:
Table renamed successfully.
(The table structure remains the same, but it is now accessed via Prof_Dependent.)
DQL commands with examples
Data Query Language (DQL) commands in SQL are used to query and retrieve data from the database. Unlike DDL (which defines structure) or DML (which modifies data), DQL focuses strictly on fetching and reading existing records without altering them.
The core command in DQL is SELECT, which is combined with various clauses (WHERE, GROUP BY, HAVING, ORDER BY, JOIN) to filter, organize, and present data.
Basic Select command
Used to retrieve specific columns or all columns from a table.
Example Query: Retrieving the ID and name of all professors.
SELECT Prof_ID, Prof_Name
FROM Professor;
Output:
| Prof_ID | Prof_Name |
| 101 | Dr. Alan Turing |
| 102 | Dr. Grace Hopper |
| 103 | Dr. Ada Lovelace |
Note: Select * is used to retrieve all columns in the table.
Select with Where
Used to filter rows that meet a specific condition.
Example Query: Finding all dependents of professors who are under 18 years old.
SELECT Prof_ID, Dep_Name, Age
FROM Dependent
WHERE Age < 18;
Output:
| Prof_ID | Dep_Name | Age |
| 101 | Alice | 12 |
| 102 | Bob | 8 |
Select with Order By
Used to sort the retrieved data in ascending (ASC) or descending (DESC) order based on one or more columns.
Example Query: Listing all students sorted alphabetically by their name.
SELECT Student_ID, Student_Name
FROM Student
ORDER BY Student_Name ASC;
Output:
| Student_ID | Student_Name |
| 503 | Carlos Ruiz |
| 501 | David Miller |
| 502 | Emma Watson |
Select with Group By and Aggregate Functions
Used to group rows that have the same values into summary rows, often paired with functions like COUNT(), AVG(), SUM(), or MAX().
Example Query: Counting how many courses each professor teaches.
SELECT Prof_ID, COUNT(Course_ID) AS Total_Courses
FROM Course
GROUP BY Prof_ID;
Output:
| Prof_ID | Total_Courses |
| 101 | 3 |
| 102 | 1 |
| 103 | 2 |
Select with Having
Used to filter grouped data created by a GROUP BY clause (since the WHERE clause cannot be applied to aggregate functions).
Example Query: Finding departments that have more than 5 students enrolled.
SELECT Dept_ID, COUNT(Student_ID) AS Student_Count
FROM Student
GROUP BY Dept_ID
HAVING COUNT(Student_ID) > 5;
Output:
| Dept_ID | Student_Count |
| 10 | 12 |
| 20 | 8 |
Select with Join
Used to combine rows from two or more tables based on a related column between them.
Example Query: Fetching course names along with the name of the professor teaching each course.
SELECT Course.Course_Name, Professor.Prof_Name
FROM Course
JOIN Professor ON Course.Prof_ID = Professor.Prof_ID;
Output:
| Course_Name | Prof_Name |
| Operating Systems | Dr. Alan Turing |
| Compilers | Dr. Grace Hopper |
| Data Structures | Dr. Ada Lovelace |
DML commands with examples
Data Manipulation Language (DML) commands in SQL are used to manage and modify the data stored inside existing database tables. Unlike DDL (which changes table structures) or DQL (which only reads data), DML commands directly add, modify, or remove data records.
Here is a breakdown of the primary DML commands using our university database.
Insert command
Used to add new rows or records into an existing table. You can insert values for all columns or specify specific columns.
Example Query: Adding a new student named “Maya Lin” belonging to Department 10 into the Student table.
INSERT INTO Student (Student_ID, Student_Name, Dept_ID)
VALUES (504, 'Maya Lin', 10);
Output:
1 row inserted successfully.
| Student_ID | Student_Name | Dept_ID |
| 501 | David Miller | 10 |
| 502 | Emma Watson | 20 |
| 503 | Carlos Ruiz | 10 |
| 504 | Maya Lin | 10 |
Update command
Used to modify existing values in one or more columns of a table. A WHERE clause is typically included to target specific rows; without it, all rows in the table will be updated.
Example Query: Updating the age of Professor 101’s dependent named “Alice” because she had a birthday.
UPDATE Dependent
SET Age = 13
WHERE Prof_ID = 101 AND Dep_Name = 'Alice';
Output:
1 row updated successfully.
| Prof_ID | Dep_Name | Age |
| 101 | Alice | 13 |
| 102 | Bob | 8 |
Delete command
Used to remove specific existing records from a table based on a condition defined in the WHERE clause. Leaving out the WHERE clause removes all rows from the table.
Example Query: Removing a student’s course registration from the Enrollment table when they drop a class.
DELETE FROM Enrollment
WHERE Student_ID = 502 AND Course_ID = 'CS101';
Output:
1 row deleted successfully.
| Student_ID | Course_ID |
| 501 | CS101 |
| 501 | CS102 |
DCL commands with examples
Data Control Language (DCL) commands in SQL are used to manage permissions, privileges, and access levels for database users. DCL commands act like security guard controls, ensuring that only authorized users can read, insert, update, or delete data within specific database tables.
There are two primary DCL commands: GRANT and REVOKE.
Grant command
Gives specific access privileges (like SELECT, INSERT, UPDATE, DELETE, or ALL) on database objects (tables, views, etc.) to specific users or roles.
Example Query: Granting a teaching assistant user (ta_user) permission to view and add grades or records in the Enrollment table.
GRANT SELECT, INSERT
ON Enrollment
TO ta_user;
Output:
Command executed successfully. Privileges granted.
Revoke command
Takes away previously granted permissions from a user or role, restricting their access to the database objects.
Example Query: Removing the permission to add records (INSERT) from ta_user on the Enrollment table, leaving them with read-only access.
REVOKE INSERT
ON Enrollment
FROM ta_user;
Output:
Command executed successfully. Privilege revoked.
TCL commands with examples
Transaction Control Language (TCL) commands in SQL are used to manage transactions, which are groups of related SQL commands (such as INSERT, UPDATE, or DELETE) executed together as a single unit of work.
TCL commands ensure database consistency and integrity. If any part of a multi-step operation fails, TCL allows us to undo the work; if everything succeeds, TCL saves the changes permanently.
TCL commands are COMMIT, ROLLBACK, SAVEPOINT and SET TRANSACTION.
Commit command
Saves all changes made during the current transaction permanently to the database. Once a COMMIT is executed, the changes cannot be undone with SQL.
Example Query: Adding a student to the Student table and enrolling them in a course, then permanently saving both operations.
BEGIN TRANSACTION;

INSERT INTO Student (Student_ID, Student_Name, Dept_ID)
VALUES (505, 'Liam Neeson', 10);

INSERT INTO Enrollment (Student_ID, Course_ID)
VALUES (505, 'CS101');

COMMIT;
Output:
Transaction committed successfully.
Both operations are now permanently saved in the
Rollback command
Undoes/reverts all changes made in the current transaction that have not yet been saved with a COMMIT. It brings the database back to its state before the transaction began.
Example Query: Attempting to assign a student to a project, but realizing an error occurred, so the change is cancelled before saving.
BEGIN TRANSACTION;

INSERT INTO Project_Assignment (Student_ID, Course_ID, Prof_ID)
VALUES (505, 'CS301', 999); -- Wrong Professor ID entered by mistake

ROLLBACK;
Output:
Transaction rolled back successfully.
The mistake is undone, and no changes are saved.
Savepoint command
Creates a temporary checkpoint within a transaction. This allows you to roll back part of a transaction to a specific point without cancelling the entire transaction.
Example Query: Adding two dependents for a professor, setting a checkpoint after the first one, and rolling back only the second dependent insertion.
BEGIN TRANSACTION;

-- Insert first dependent
INSERT INTO Dependent (Prof_ID, Dep_Name, Age)
VALUES (101, 'Charlie', 5);

-- Create a checkpoint
SAVEPOINT AfterFirstDependent;

-- Insert second dependent
INSERT INTO Dependent (Prof_ID, Dep_Name, Age)
VALUES (101, 'David', -2); -- Invalid age entered

-- Rollback only to the checkpoint
ROLLBACK TO AfterFirstDependent;

-- Commit the remaining valid changes
COMMIT;
Output:
Rolled back to checkpoint ‘AfterFirstDependent’, then committed.
Set Transaction command
Establishes specific properties for the current transaction, such as making it read-only or setting its isolation level to prevent conflicts between simultaneous users.
Example Query: Setting a transaction to read-only mode while running an audit report on enrollment data.
SET TRANSACTION READ ONLY;

BEGIN TRANSACTION;

SELECT Student_ID, Course_ID
FROM Enrollment;

COMMIT;
Output:
Transaction executed in READ ONLY mode.
Queries can read data, but any modification commands (INSERT, UPDATE, DELETE) would be blocked during this transaction.

Mr. P.S.Suryateja, also known as Suryateja Pericherla, is at present a Research Scholar (full-time Ph.D.) in the Dept. of Computer Science & Systems Engineering at Andhra University, Visakhapatnam. Previously worked as an Associate Professor in the Dept. of CSE at Vishnu Institute of Technology, India.
He has 14+ years of teaching experience and is an individual researcher whose research interests are Cloud Computing, Internet of Things, Computer Security, Network Security and Blockchain.
He is a member of professional societies like IEEE, ACM, CSI and ISCA. He published several research papers which are indexed by SCIE, WoS, Scopus, Springer and others.
Leave a Reply