

In this tutorial article, we will look at step by step installation of NS2 on Windows 10/11.
We’ve had great help from Windowsfixhub for updating this guide, so if you’re looking for some quality Windows guides — we encourage you to visit them.
Now let’s begin with the NS2 tutorial for Windows.
Note: The below installation process was verified in Windows 10 only. It might work for Windows 11 also.
Watch this video to learn how to install NS2 on Windows 10/11 operating system:
STEP 1
Turn on Developer Mode
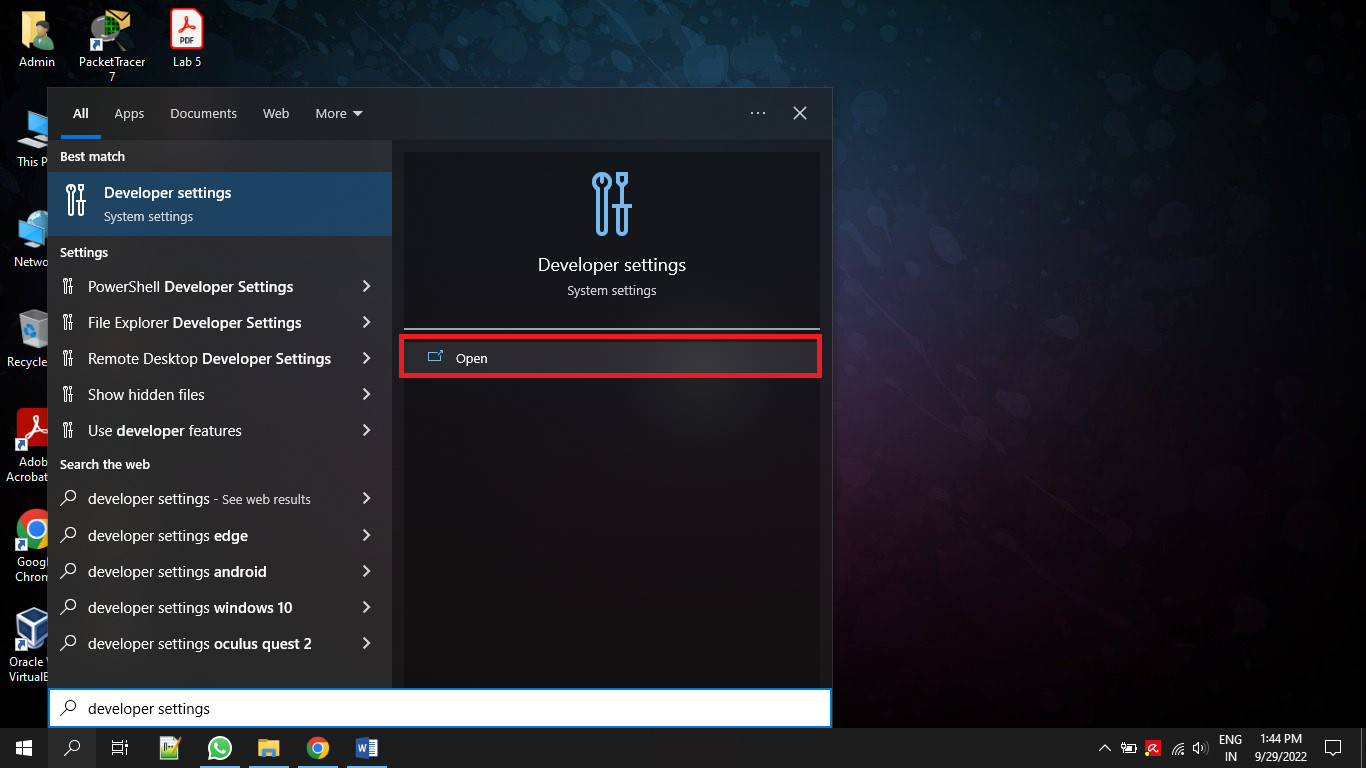
Open search (Windows + S) and type “developer settings” and click on Open as shown below:
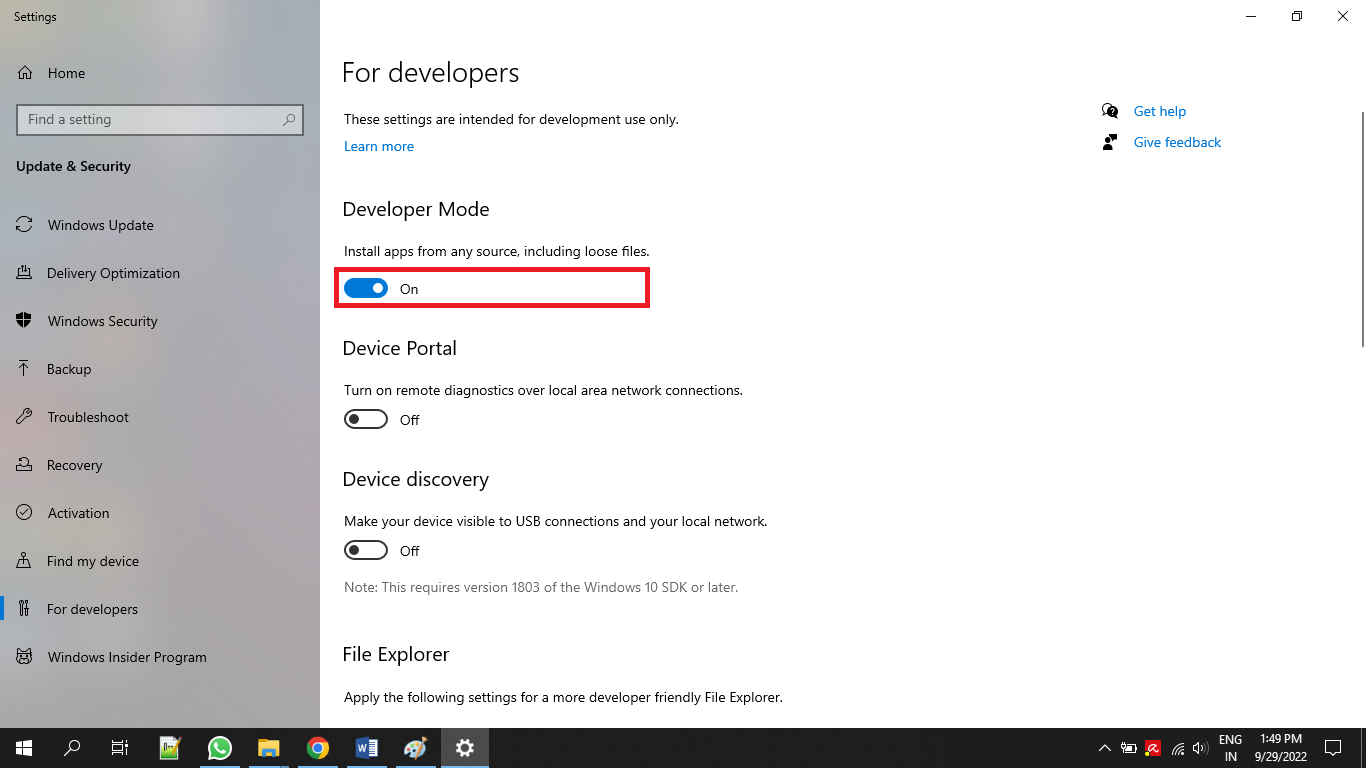
Turn on the option “Install apps from any source…” as shown below, click YES and close the window.
STEP 2
Turn on WSL (Windows Subsystem for Linux)
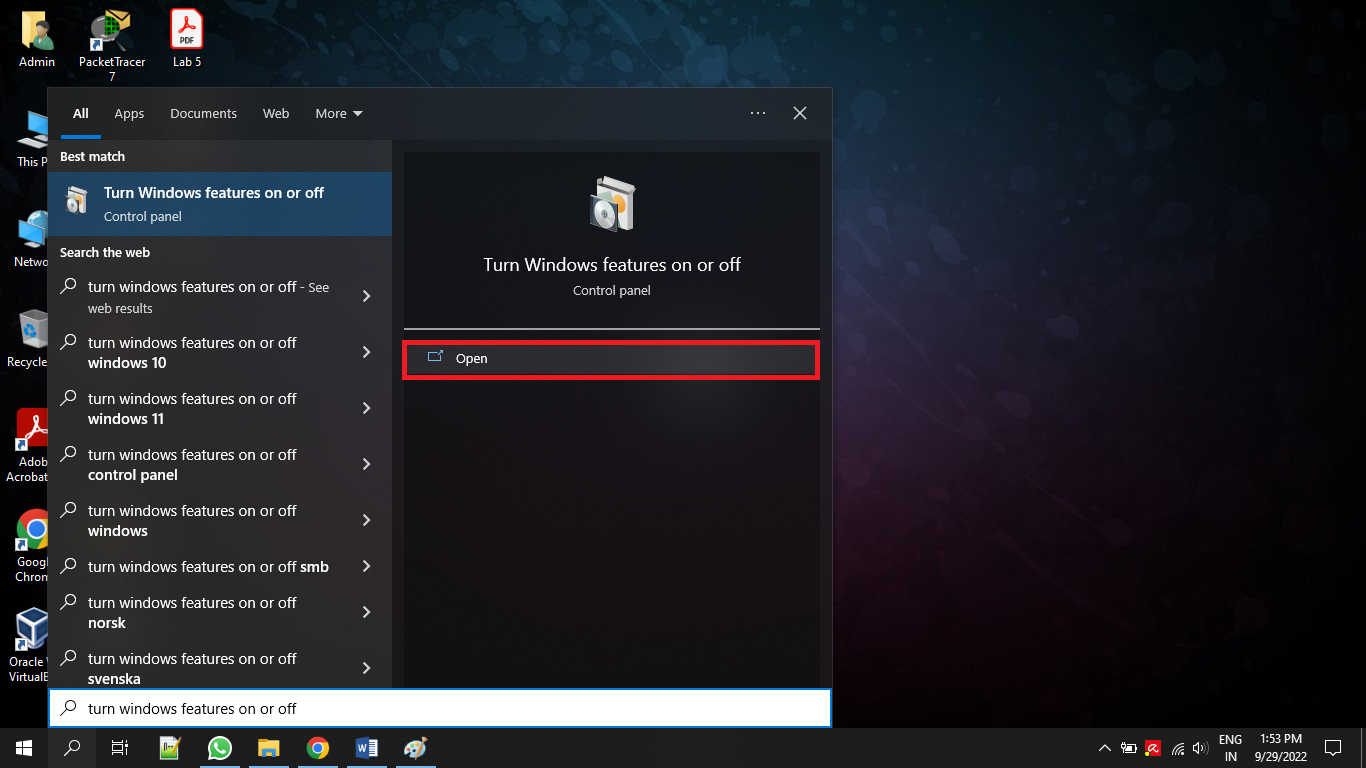
Open search and type “turn windows features on or off” and click on Open as shown below:
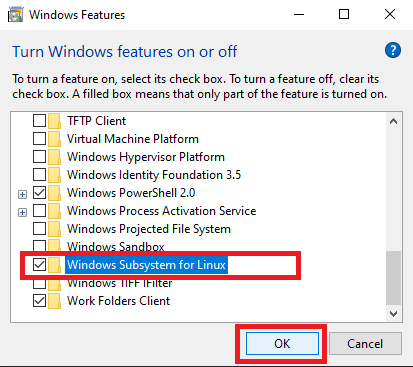
Scroll down the options and check the item named “Windows Subsystem for Linux” and click on OK as shown below:
STEP 3
Install Ubuntu from Microsoft Store.
Click on search and type “Microsoft Store” and click on Open.
In the search bar at the top, type “Ubuntu” and click on “Install” button as shown below:
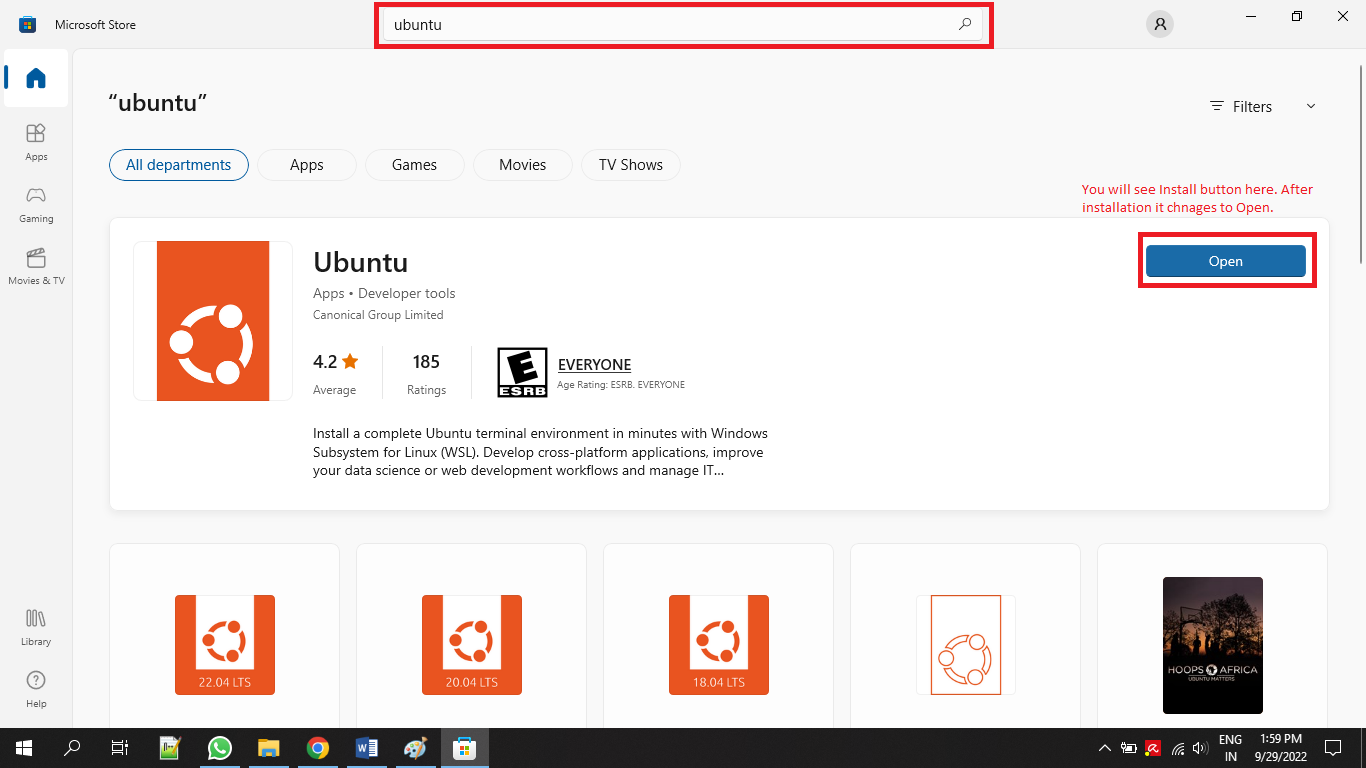
It will take some time to download and install the Ubuntu app as it is nearly 700 MB.
STEP 4
Install Xming.
Open Google in a browser and type “Xming Download” or go to this URL https://sourceforge.net/projects/xming/ and click on the “Download” button.
After downloading Xming, install it.
STEP 5
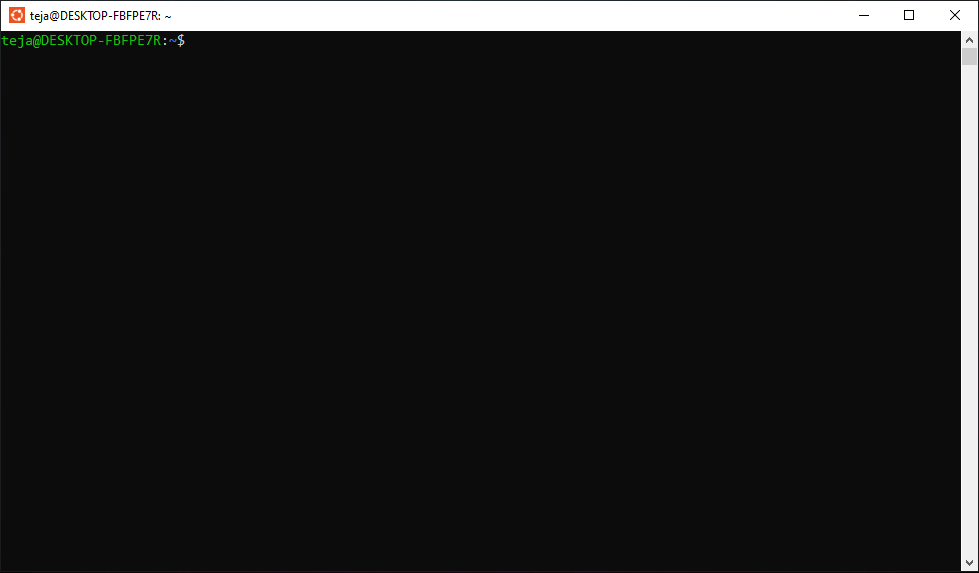
Open search and type “Ubuntu” and click on Open.
As it is the first time you are opening Ubuntu, it will ask for Username and Password. Give a username and password and hit enter key. Now you should see a prompt as shown below:
Type the following commands one by one and hit enter after each command:
- sudo apt update
- sudo apt-get install ns2
- sudo apt-get install nam
- sudo apt-get install gedit
- sudo apt install tcl
If your Internet connection is slow, this step will take some time to complete. When asked for username and password provide them as given before.
STEP 6
Changing the location to working directory.
For this example, for working directory name is “ns2” and it is located on my “Desktop”. The complete path to “ns2” directory on my PC is “C:\Users\Admin\Desktop\ns2”.
To change the location to the above directory, type the following command and hit Enter key.
You can see the above command in action in the below figure:
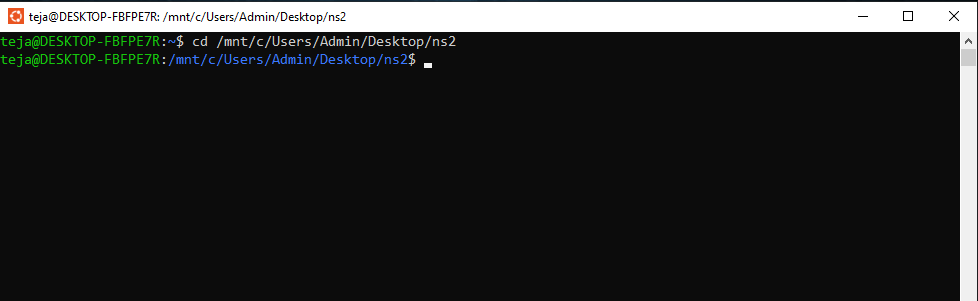
Note the path may vary from system to system. My ns2 programs are going to be saved in the “ns2” folder as shown above.
STEP 7
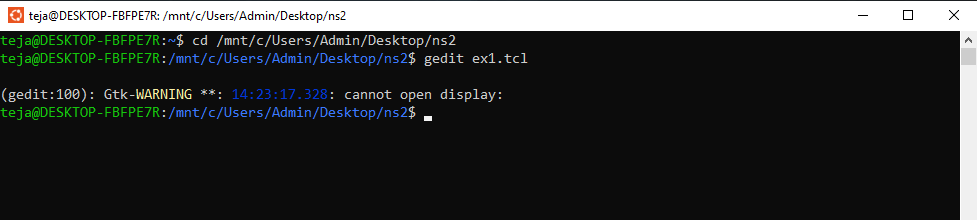
Opening gedit and typing the program.
Type the following command in the terminal (black window) and hit Enter key.
You might get a warning message as shown in below figure:
For opening the “gedit” application we have to start the “Xming” application.
Open search and type “Xming” and click on “Open”.
The “Xming” server will be started and it will available in the system tray on the taskbar. Sometimes it might get hidden in the system tray and is not always visible.
Now, in the terminal type the following command as shown in the figure below and hit enter key.

Now, type the following command in the terminal (black window) and hit Enter key.
You should be able to see a blank gedit window as shown in below image.
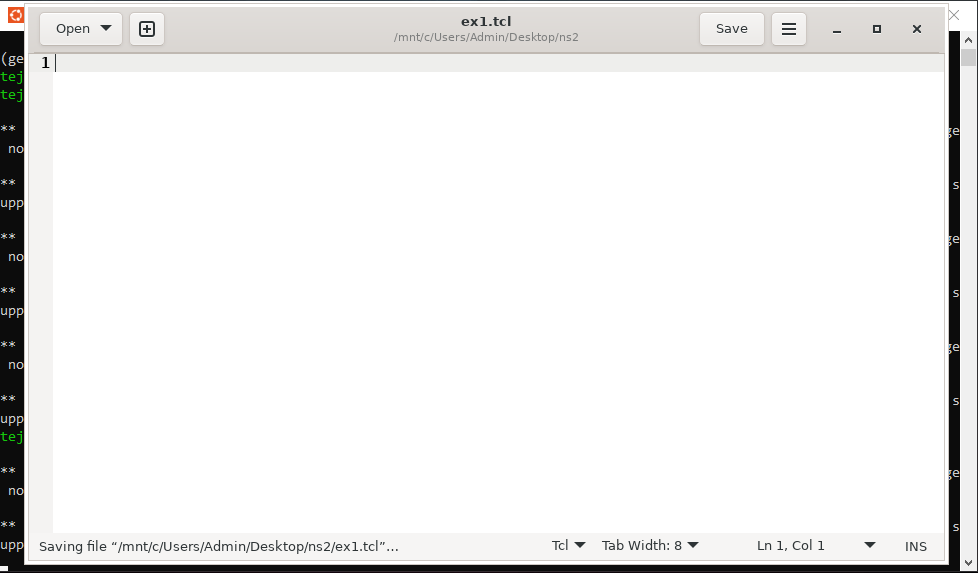
Type the following sample program and save (CTRL + s) the file. Now close gedit window.
#Create global variables
set ns [new Simulator]
#setting nam trace
set namf [open wired1.nam w]
$ns namtrace-all $namf
#open the trace file
set tracef [open wired1.tr w]
$ns trace-all $tracef
set proto rlm
#setting the color values
$ns color 1 blue
$ns color 2 yellow
$ns color 3 red
#———- creating client- router- end server node—————-#
set n0 [$ns node]
set n1 [$ns node]
set n2 [$ns node]
#establish the link between the nodes
$ns duplex-link $n0 $n1 2Mb 100ms DropTail
$ns duplex-link $n1 $n2 200Kb 100ms DropTail
#Label the nodes
$ns at 0.0 “$n0 label Client1”
$ns at 0.0 “$n1 label Server”
$ns at 0.0 “$n2 label Client2”
#setting the color for nodes
$n0 color blue
$n1 color red
$n2 add-mark pradeep green square
#Shaping the nodes for differentiation
$n1 shape hexagon
$n2 shape square
#finish procedure
proc finish {} {
global ns tracefnamf
$ns flush-trace
close $tracef
close $namf
puts “Opening nam…”
exec nam wired1.nam &
exit 0
}
#Calling finish procedure
$ns at 2.0 “finish”
$ns run
STEP 8
Running the program using “ns” command.
Type the following command in the terminal to run the program and see the output.
Now, you should be able to see the network animator (nam) window with the topology as shown in the below figure.
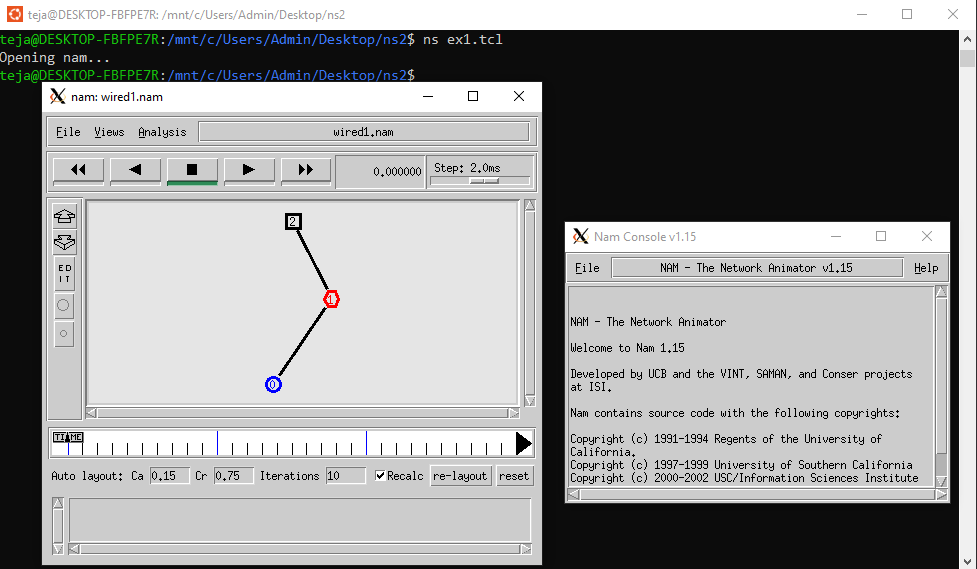
If you can see the above output, it means that you have installed ns2 successfully on your system.
Download NS2 Installation Procedure for Windows 10 and 11 which can be distributed to your students.
References

Suryateja Pericherla, at present is a Research Scholar (full-time Ph.D.) in the Dept. of Computer Science & Systems Engineering at Andhra University, Visakhapatnam. Previously worked as an Associate Professor in the Dept. of CSE at Vishnu Institute of Technology, India.
He has 11+ years of teaching experience and is an individual researcher whose research interests are Cloud Computing, Internet of Things, Computer Security, Network Security and Blockchain.
He is a member of professional societies like IEEE, ACM, CSI and ISCA. He published several research papers which are indexed by SCIE, WoS, Scopus, Springer and others.
thanks a lot
I need tutorial on installation of NS-3 on windows 11