In this article we will look at how to access MIT app inventor interface, how to create a project, how does the user interface of MIT app inventor looks like, and what are the different sections available in the user interface.
Contents
Accessing MIT App Inventor
To access app inventor, you must have a google (or gmail) account and a decent broadband connection. MIT app inventor cannot be used without Internet. If you don’t have one, create it. Login in to your gmail account. Now, open the following URL:
http://ai2.appinventor.mit.edu/
If this is your first time using app inventor, it will display a message to allow app inventor to access your google account’s information. Click on Allow button.
Now, you will see the app inventor’s dashboard as shown below:

Note: Your projects list will be empty if you don’t create any. In the above figure, “OWLHowl” is a project which was already created by me.
Creating New Project
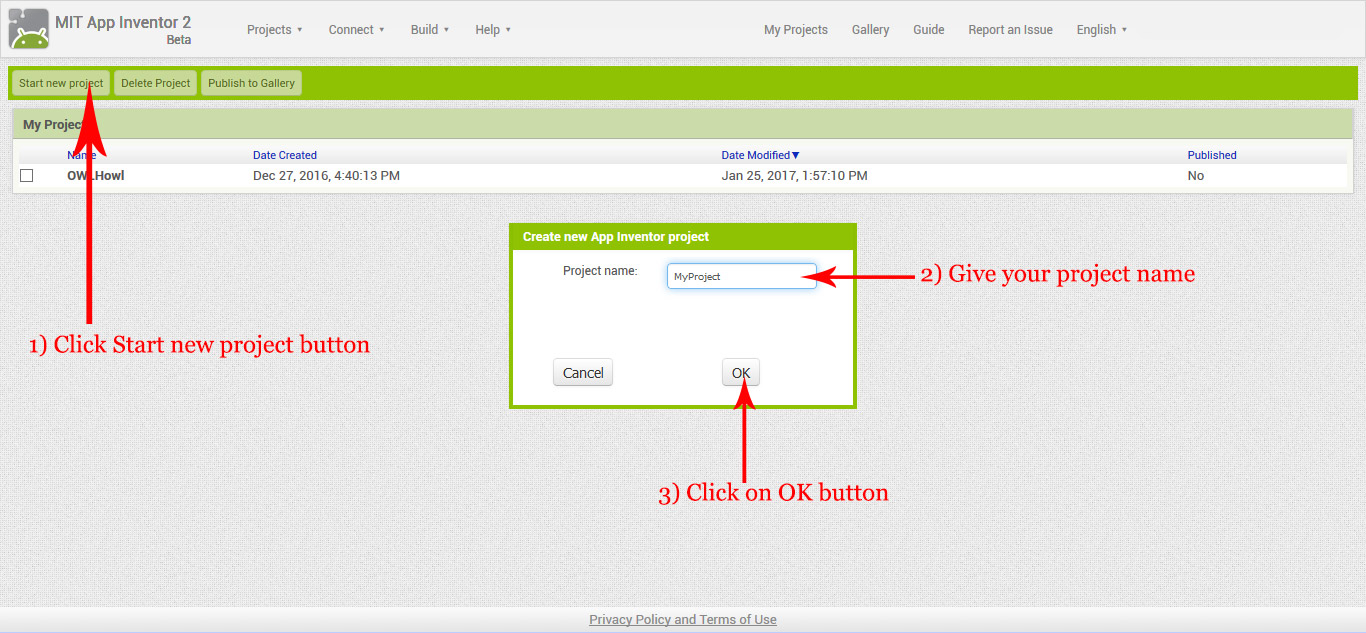
For creating a new project, first you have to click on Start new project button. Enter your project name and then click on OK button as shown in the image below:
Now, you will see your project environment as shown in the below image:
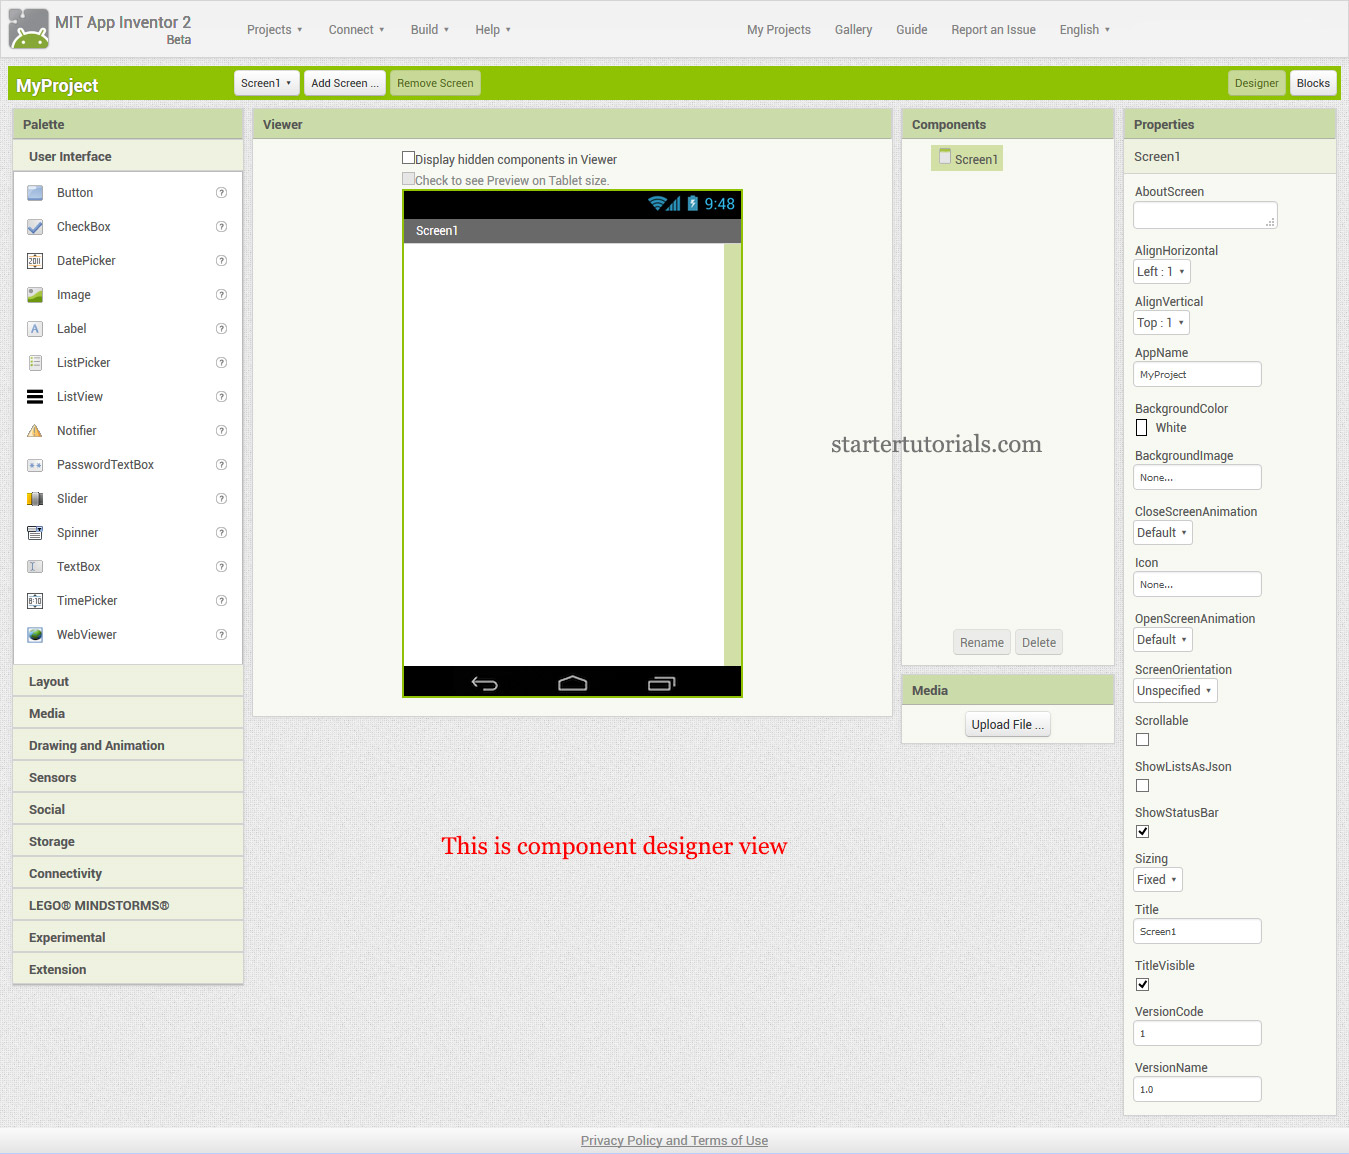
The project environment contains two views: 1) Component designer view and 2) Blocks view.
By default, when a project is opened, you will be in component designer view as shown in the above image. To change in to blocks view click on the Blocks button in the top right hand side corner. Now you will see the blocks view as shown in the below image:
The component designer view is used to place and move components (buttons, labels, text, etc…) that will be seen in our app. The blocks view contains lego like code pieces which can be easily placed and rearranged as needed.
Component Designer View
The component designer contains four sections in general. They are:
Viewer: This is the place where you can place components like button, label, image, etc. and move them around. The viewer provides only a rough preview of what you will actually see on the mobile. To see how your app looks like actually, test it on your mobile device.
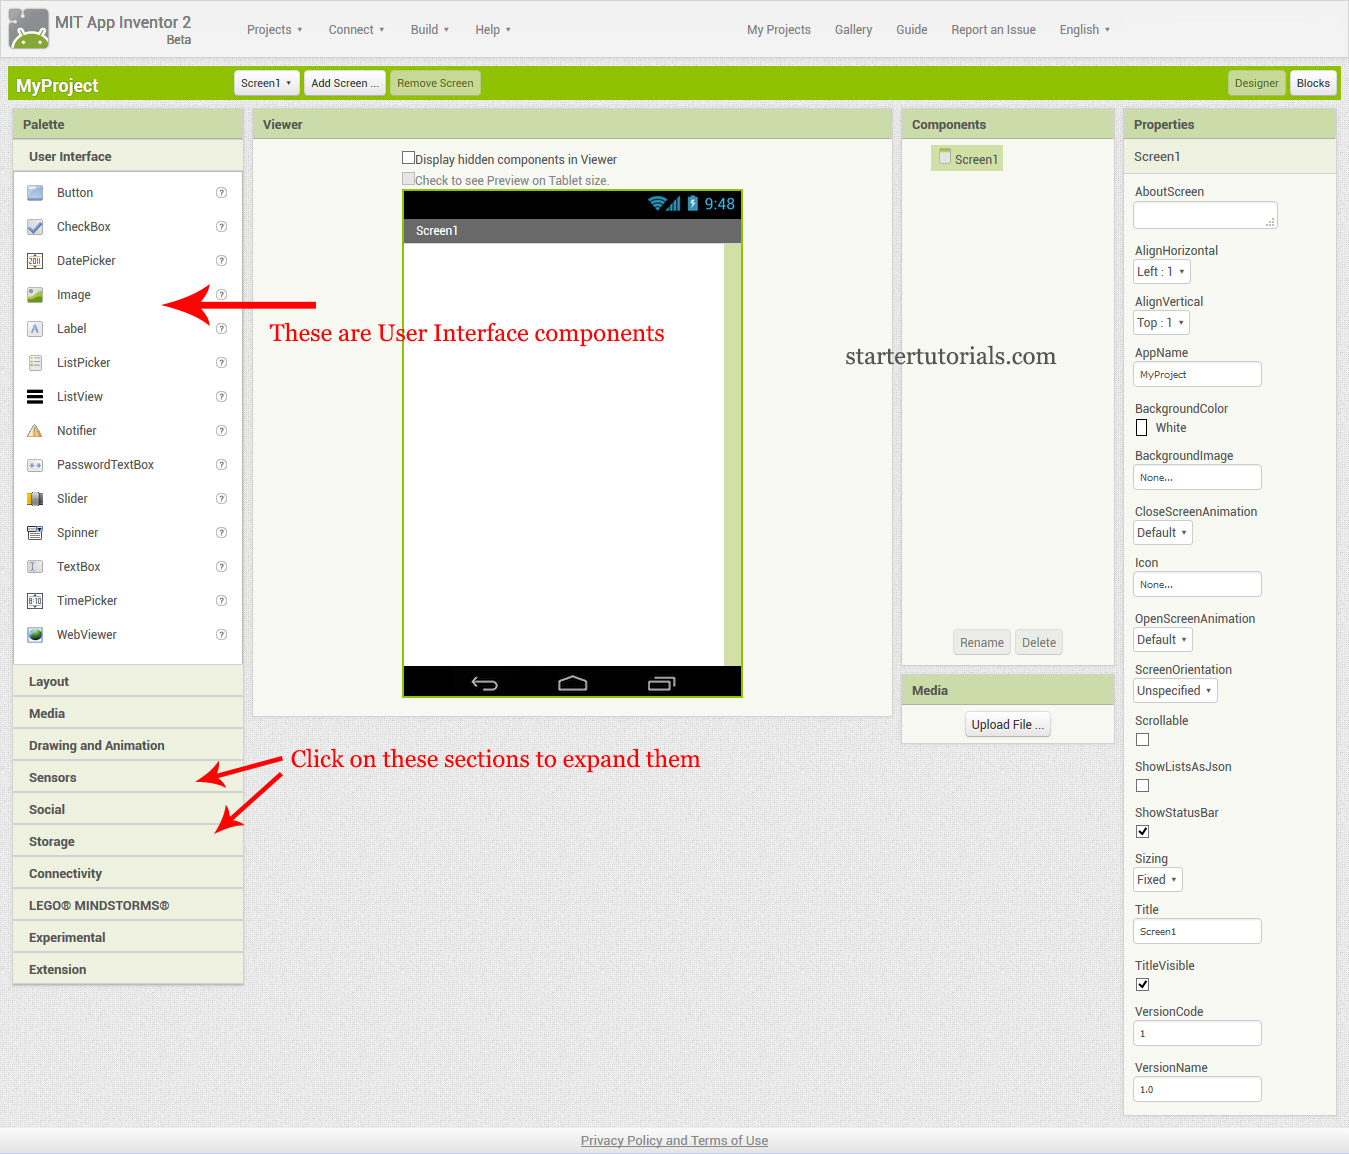
Palette: The palette contains several components which are arranged in to different sections. By default you will see User Interface section which contains button, checkbox, and other components as shown in the below image:
To add a component to the screen (white area in the viewer), select the component, drag-and-drop it on to the white area. For example, I selected a button and added it to my screen as shown in the below image:
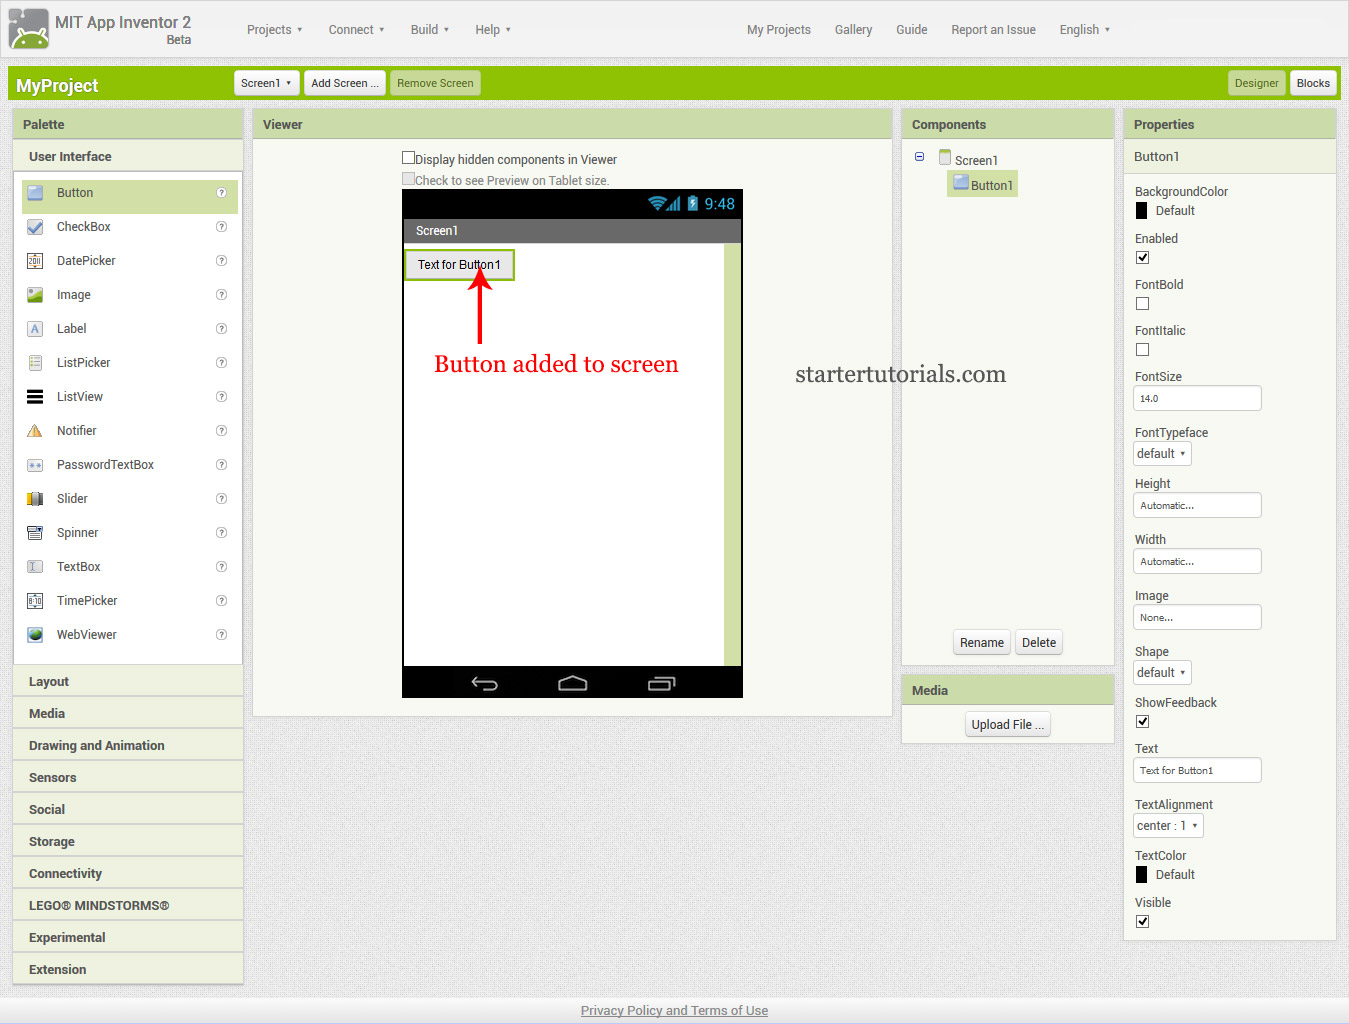
Components: The components area contains a list of components that are currently added to our project. In the above image we can see that the components area contains two components: Screen1 and Button1.
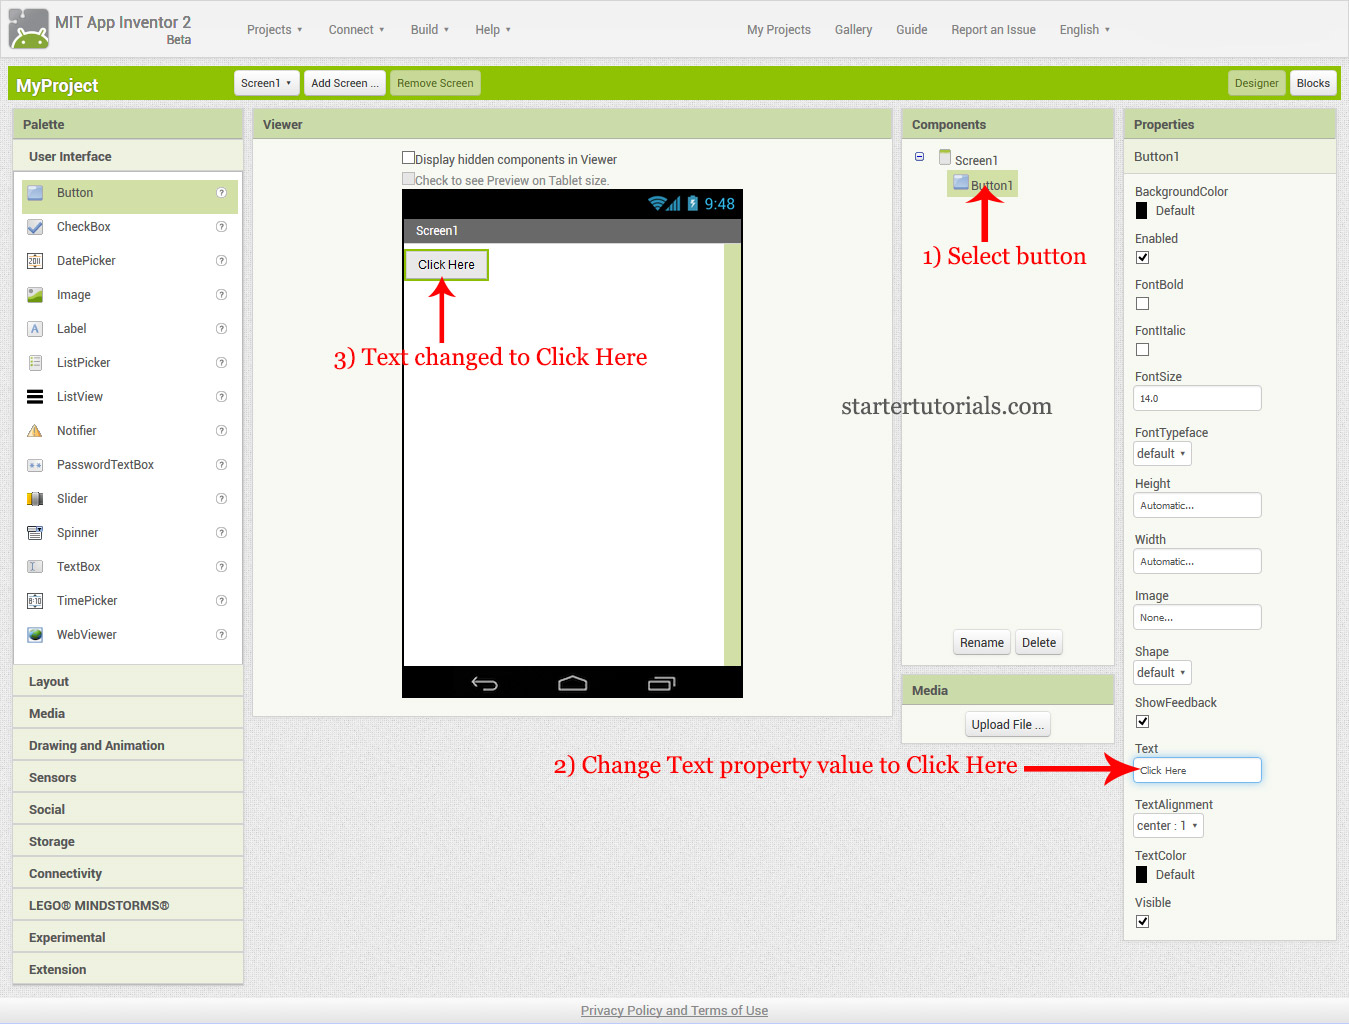
Properties: The properties area can be used to change the properties of a component added to our project. For example, we can change the button text to Click Here by selecting the Button1 component in the components area and changing the value of Text property as shown in the below image:
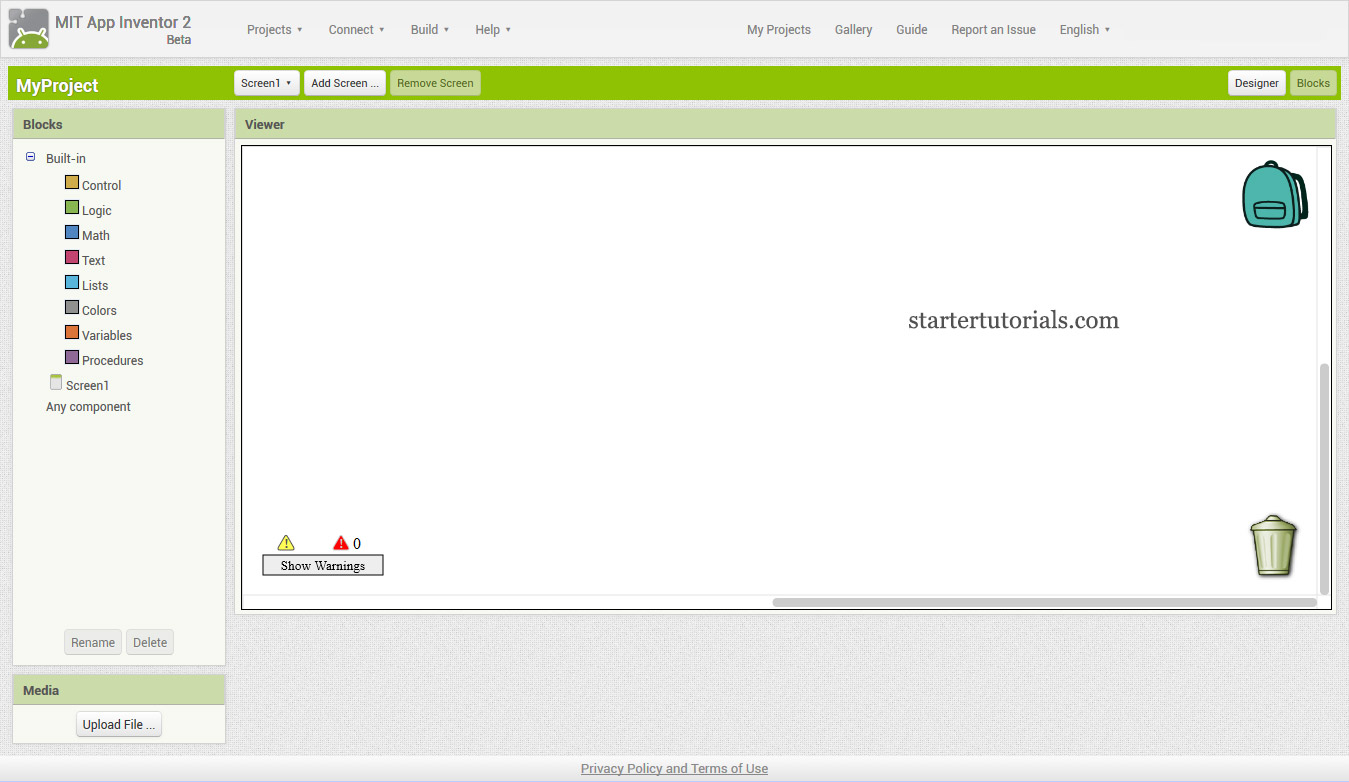
Blocks View
The blocks view contains several drag-and-drop code blocks arranged in to groups like: Control, Logic, Math, Text, Lists, Colors, Variables, and Procedures.
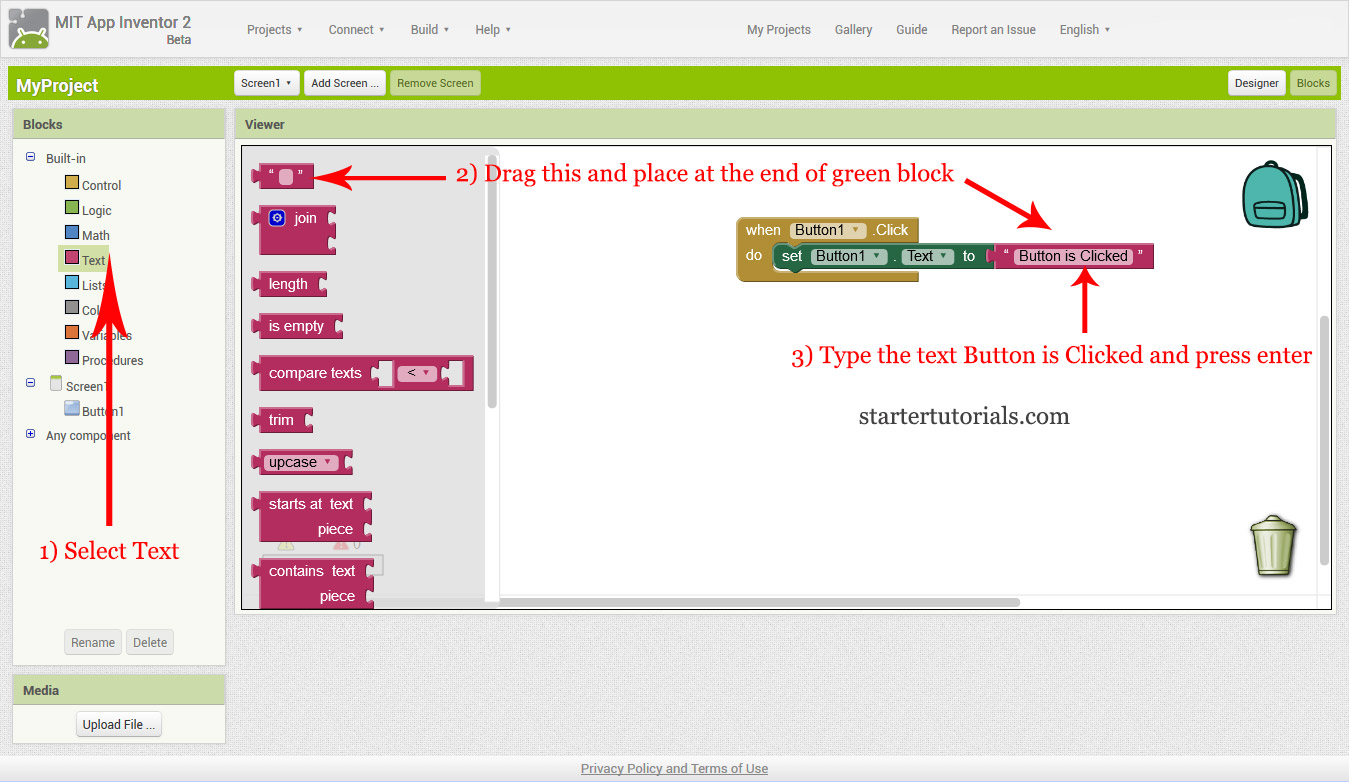
As an example for using the code blocks, I am going to change the text of the button to Button is Clicked when the user touches the button. To do this, first select our button, Button1 in the blocks view and place the when Button1 click block on to the viewer as shown in the below image:
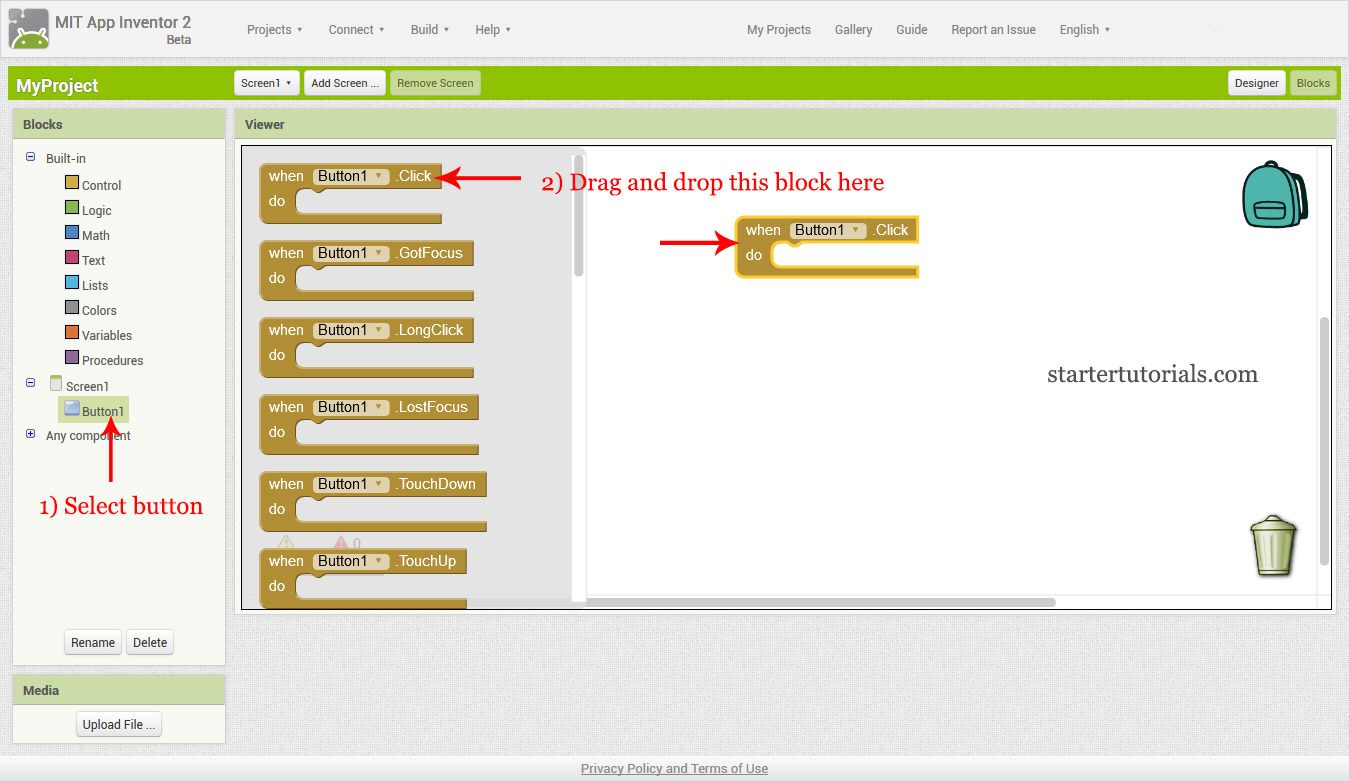
The block we just selected is a control block. A control block is used to respond to a event (like click) performed on a component.
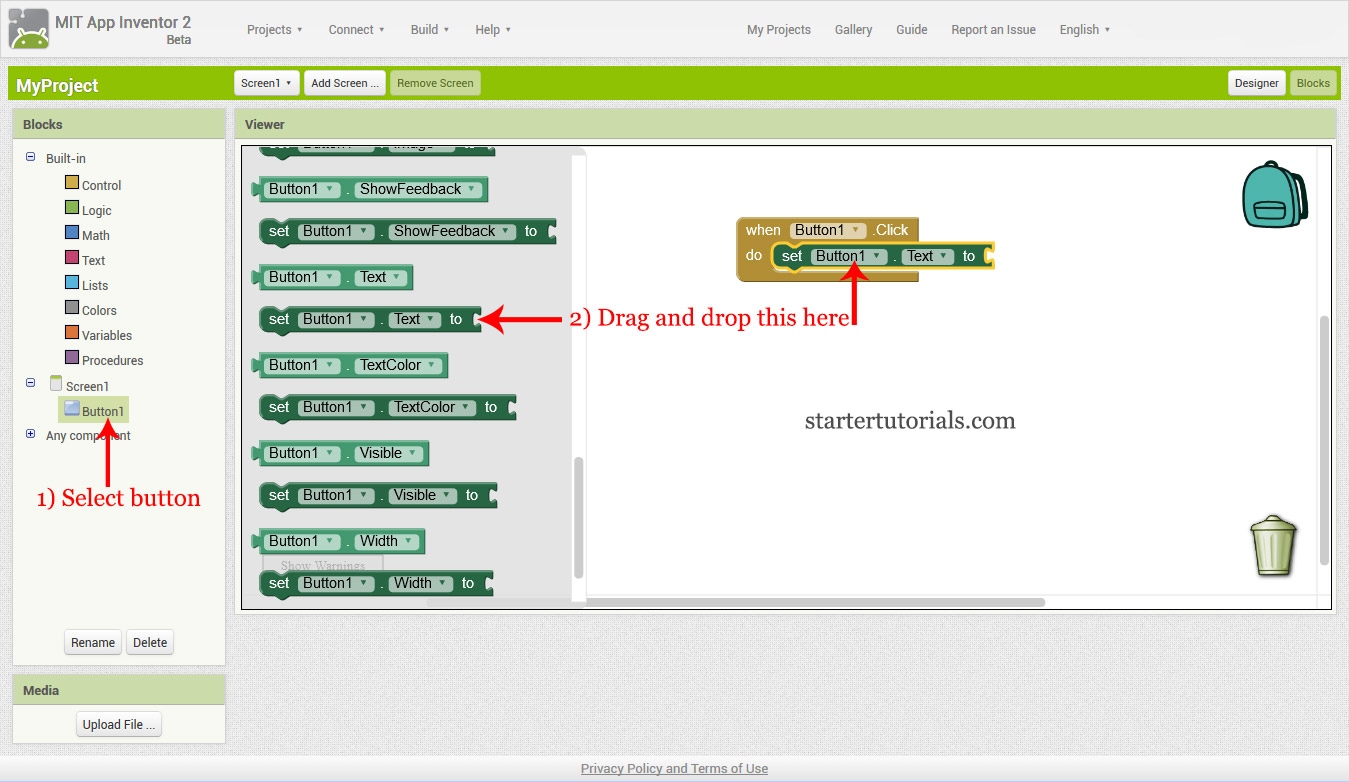
Now, we have to change the text of our button. To do this again select our button on the left side and select the green block saying set Button1 Text to and place it inside our brown control block which was placed before in the viewer area as shown in the below image:
Now, to change the text of the button to Button is Clicked, select Text blocks and select the block displaying “O” and attach to the end of our green block which was placed earlier. Type the text Button is Clicked in the empty space of the magenta colored block as shown in the below image:
Now, it’s time to test our app. Let’s see how to do that.
Testing the App on Mobile
There are several ways to test our app. I am listing two of the best and easiest ways to test our app. Both of these methods require a mobile phone and Internet connection.
Method 1: Using MIT AI2 Companion APP
This method requires that your mobile has a Wi-Fi connection.
In your mobile open google play store. Download and install the app named MIT AI2 Companion.
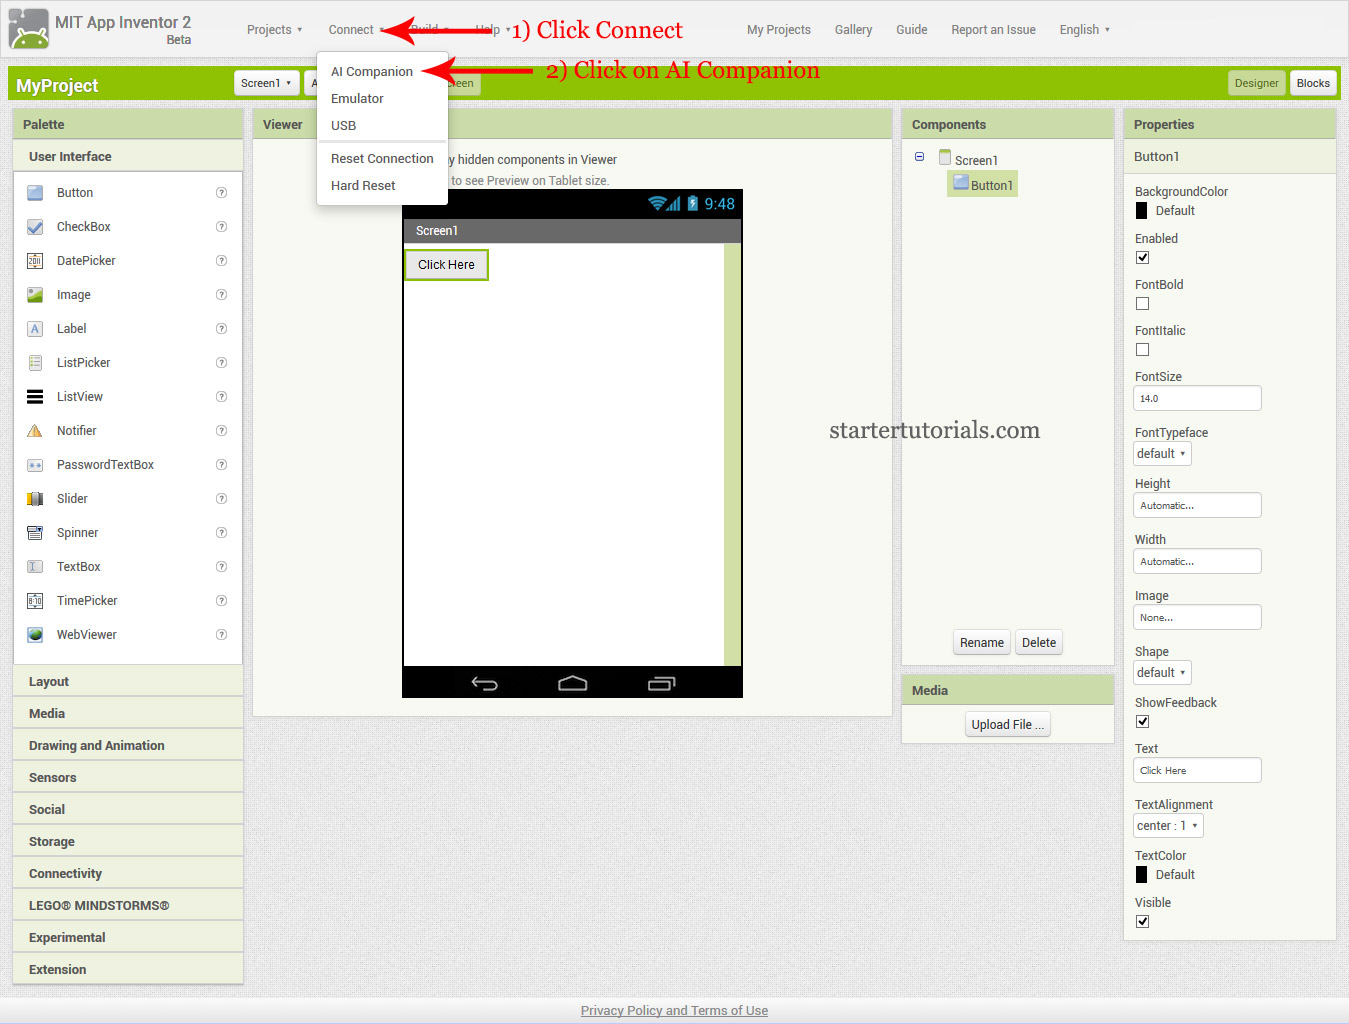
Now, in your project click on Connect at the top and then click on AI Companion as shown in the below image:
It will show you QR code and textual code as shown in the below image:
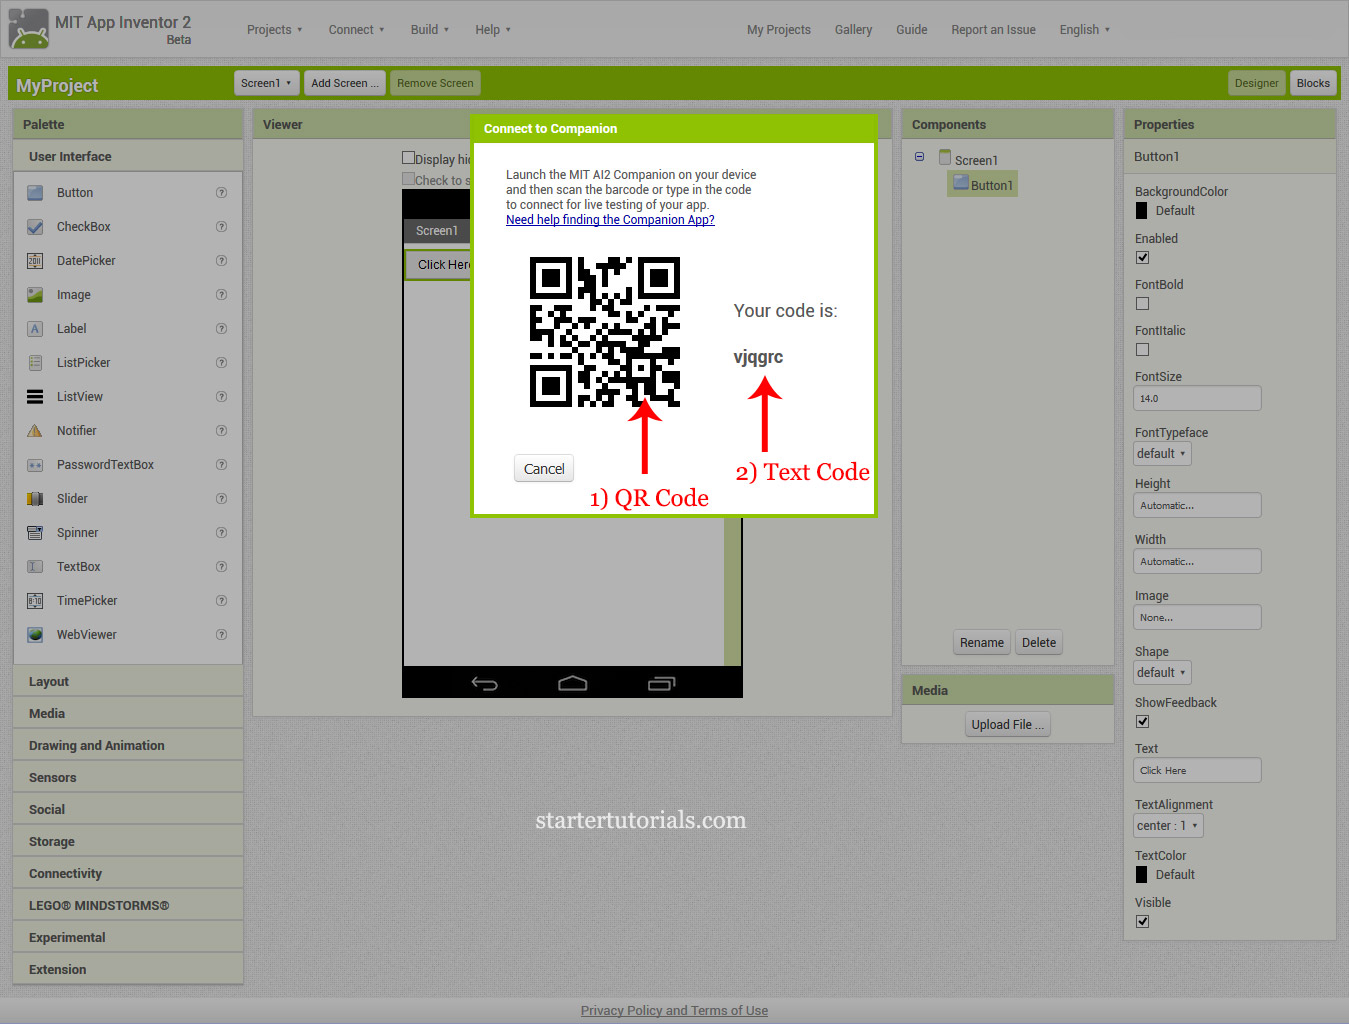
Now open MIT AI2 Companion in the mobile and enter the text code as shown above or you can scan the QR code. After the entering the code and clicking connect or after scanning the QR code, your app is downloaded in to your mobile and you can see the screen with a button on it saying Click Here.
Method 2: Download APK
This method is for people having mobile with Internet connectivity, but no Wi-Fi.
Click on Build and then select App (provide QR code for .apk) as shown in the below image:
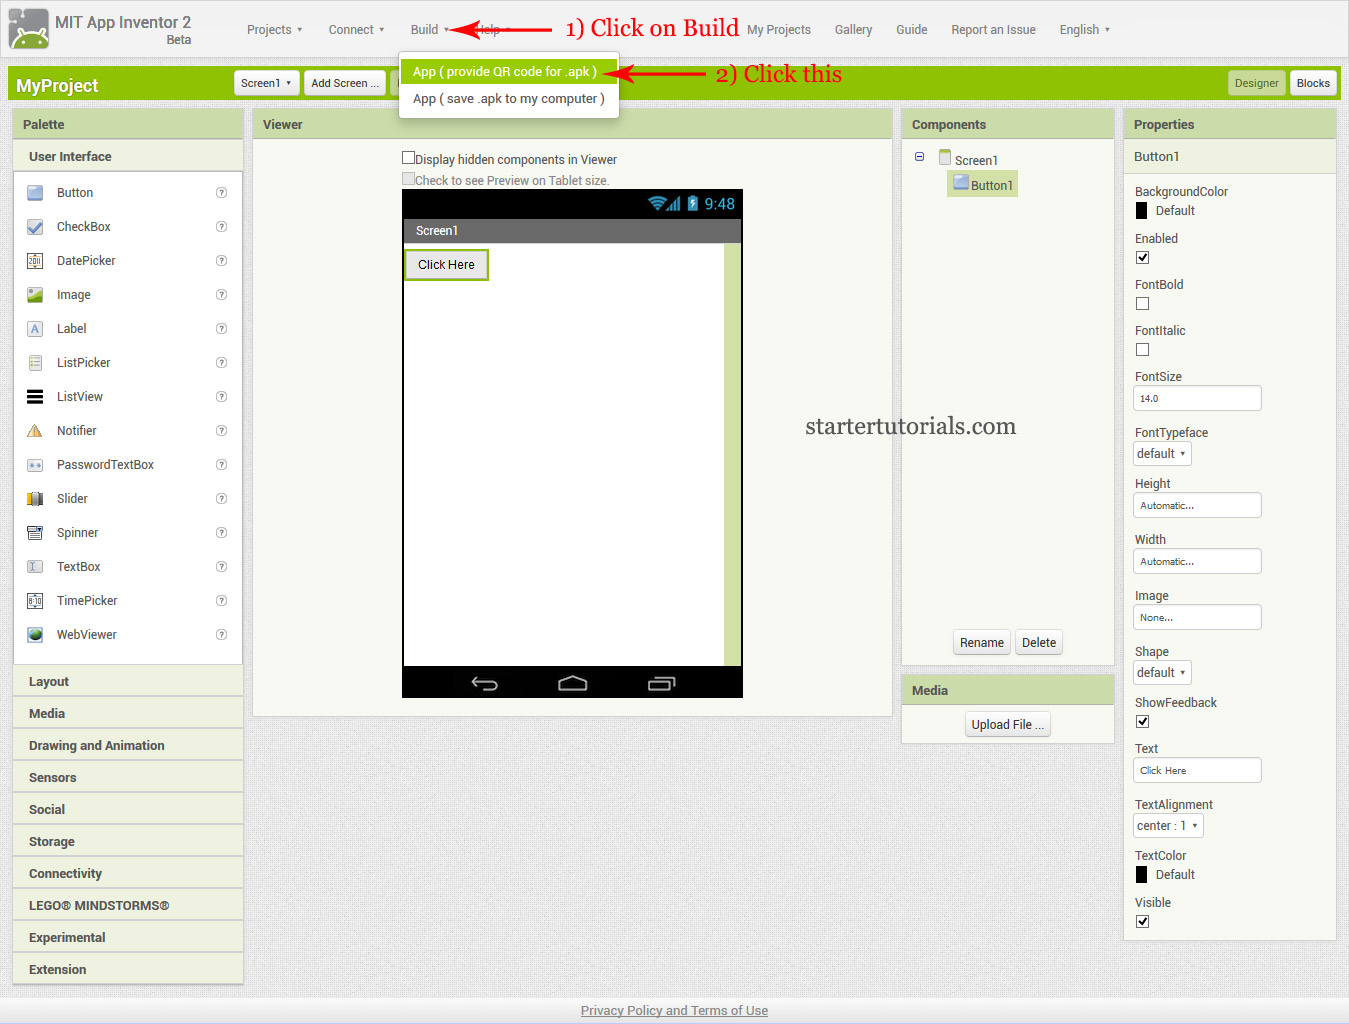
It will show the QR code as shown in the below image:
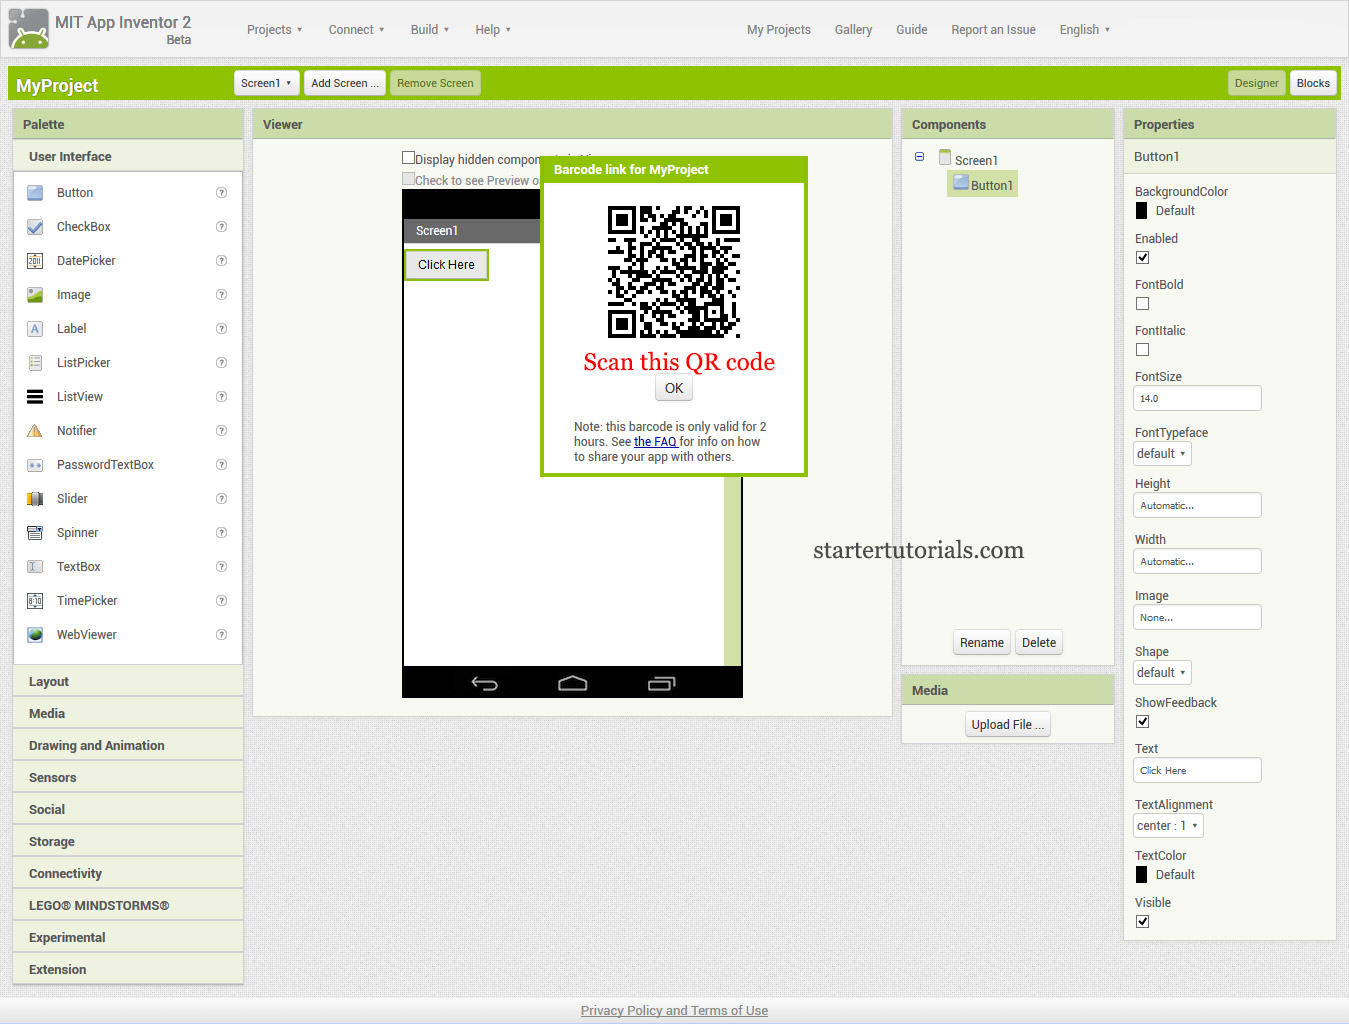
Scan the QR code shown in the above image using your mobile (download a free QR code scanner app from google play store). It will download the .apk file to your mobile and installs it. Then you can click the app to see your apps output.
This is it for this article. I will cover new concepts in the next article. If you have any errors or doubts do comment in the form below.

Suryateja Pericherla, at present is a Research Scholar (full-time Ph.D.) in the Dept. of Computer Science & Systems Engineering at Andhra University, Visakhapatnam. Previously worked as an Associate Professor in the Dept. of CSE at Vishnu Institute of Technology, India.
He has 11+ years of teaching experience and is an individual researcher whose research interests are Cloud Computing, Internet of Things, Computer Security, Network Security and Blockchain.
He is a member of professional societies like IEEE, ACM, CSI and ISCA. He published several research papers which are indexed by SCIE, WoS, Scopus, Springer and others.
Leave a Reply